
Look, I fully intended to keep to my plan of "no more sewing for the fall" since I had such a hectic summer sewing costumes for Dragon Con, however I became very angry with Nordstrom's recently as I was shopping for a dress to wear to our cousin's wedding, and when I become angry, apparently I
 |
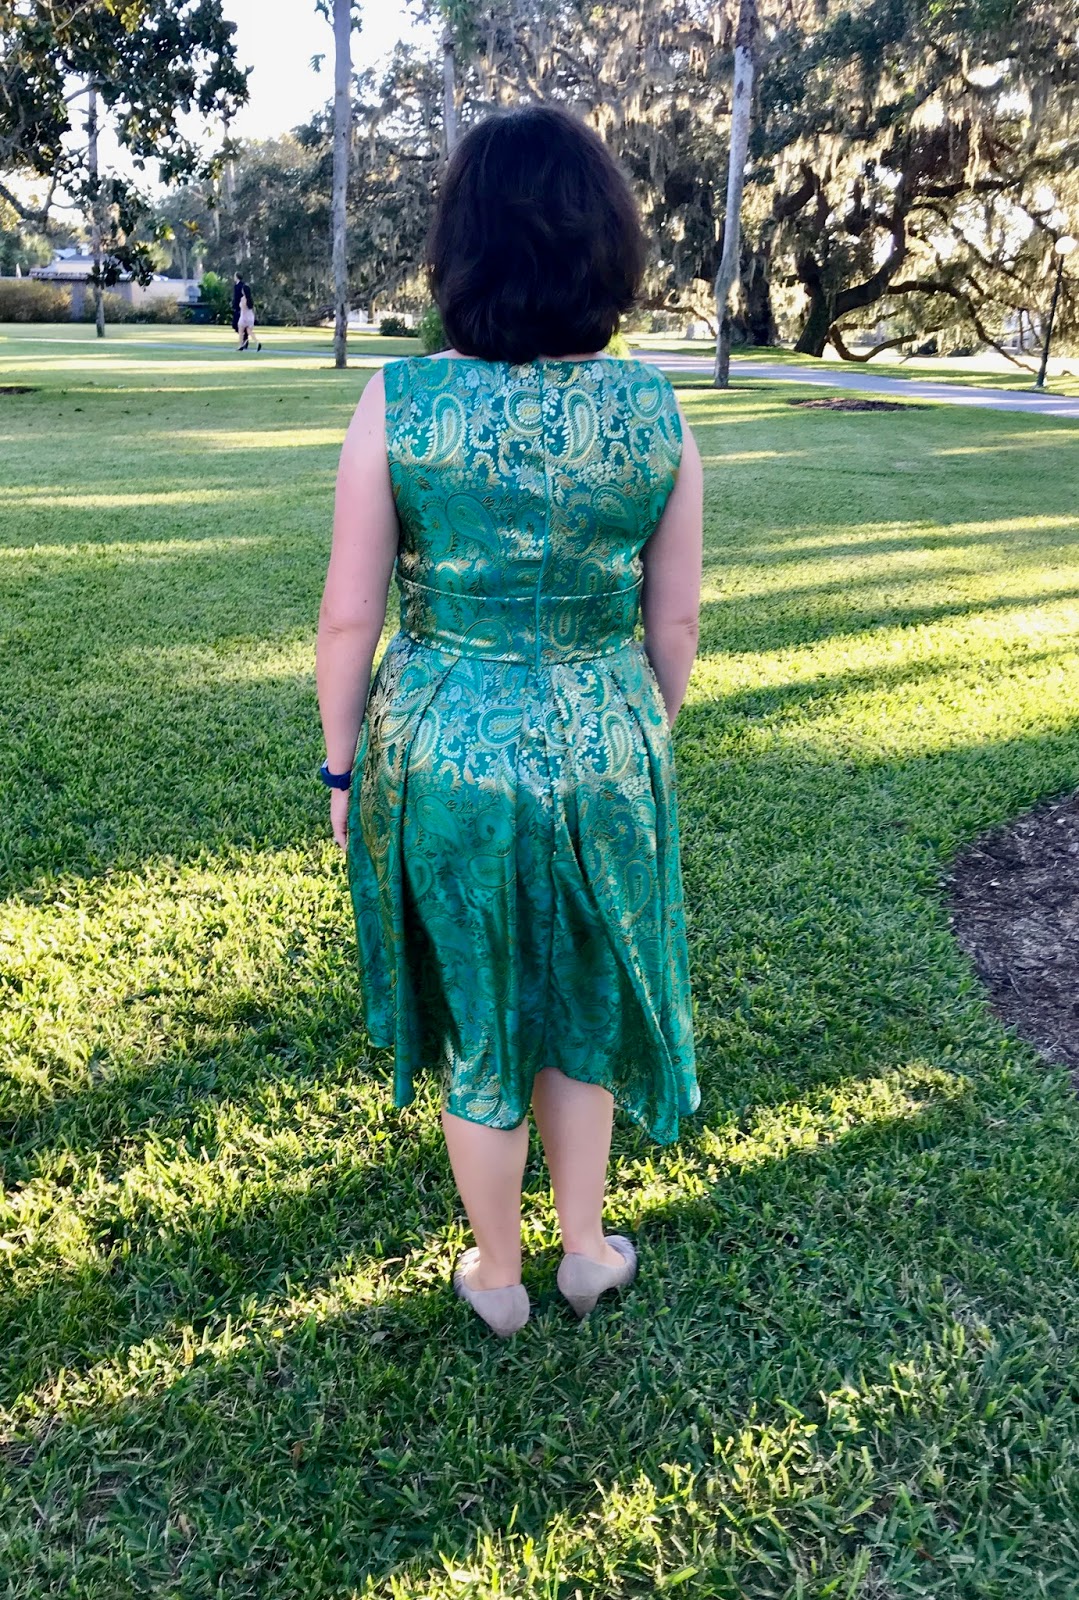
| Hopefully the rage wasn't too noticeable in the final product |
So here's the story.
Our cousin was getting married this past weekend and a few weeks ago I began looking for a dress. I knew that as with most off-the-rack clothing, I'd have to book in time to have it professionally altered because a.) I'm scared to alter expensive clothing and b.) I don't have a serger, which is required for most professional tailoring (Note to Husband: Hint. Hint.). The invitation said the wedding was formal, which I took to mean long dress.
After a week of browsing around online and in stores, I settled on this gorgeous Adrianna Papell dress from Nordstrom's. As you can see from the picture, IT FANCY. As you can see by the price tag, IT ALSO EXPENSIVE. But I thought, what the hell, it's a lovely dress, surely I could have it hemmed to knee-length after the wedding and continue to wear it for other events in the future?
One of the reasons I purchased the dress from Nordstrom's is that they ostensibly offer free hemming on dresses and skirts. You can find this information on their website, in their dressing rooms, and directly from the sales associates. My dress needed to have both the hem raised and the shoulder straps taken up, because I am hobbit apparently. I booked an appointment with the alterations department and went. Did I mention that my nearest Nordstrom's is 48 minutes away in Saturday traffic?
Long story short - they wanted to charge me an additional $65 for the alterations. I argued. I reasoned. I pleaded. The store apparently has a separate alterations fee schedule for formal wear that is POSTED NOWHERE in their dressing rooms or on their website. Additionally, the skirt did not even have a separate lining and I HONESTLY COULD HAVE DONE IT MYSELF if I had had a serger (again, Husband, if you are listening...ahem.).
So... I rage-quit Nordstrom's. I said No to the Alterations, No to the Dress, returned everything and then drove to JoAnn's.
Ah. JoAnn's. My happy place. :)
Fabric and Pattern
Armed with a lot of anger and a 60%-off-one-full-price-item coupon, I browsed first through the fabric selections. Did any of the fabric appear ~fancy dress~ worthy? Was it less than $30 a yard? I settled on this jade paisley brocade - normally $12.99 a yard, but significantly less with my coupon.
 While I waited my turn for the cutting counter, I browsed the party dress patterns to see if any looked do-able. I was really hoping to find one cut exactly like the black dress in the Audrey Hepburn version of Sabrina, but I ended up settling on New Look 6526. I think I was inspired because the fabric in the picture is shiny, and my brocade was shiny. #Logic
It required a lining, so I tried to find a gold that matched the paisley in the pattern. I actually liked that it required a lining, because as I learned when making the Chambray Dress from Hell, a fully-lined bodice actually has the smoothest neckline possibly without topstitching. And I hate me some topstitching.
One thing I found odd about the pattern once I purchased the pattern + fabric and got to sewing was that it asked you to cut out the pieces with the fabric folded hamburger-fold rather than hot-dog fold (technical terms). I assume it was to ensure that the fabric weave hung a certain way, but it ended up requiring a lot more fabric than dresses tend to require. Luckily I think I only ended up needing 3 1/2 yards of the brocade and less than 2 of the lining.
All told, $20 for the brocade, $6 for the lining, and $5 for a zipper and matching thread.
Sizing
I have a very pear-shaped form, and my shoulders are rounded, so I end up doing a smaller size in the shoulders, a medium size in the waist, and a large size in the hips. This requires some tricky cutting with the pattern, made even more difficult by patterns with multiple pieces across each area. The worst part about lined bodices is that you can't make alterations easily to them without deconstructing the entire operation, so you absolutely have to get it right the first time. This is one of the reasons I made a complete mock-up when I was doing the bodice for my Westworld costume.
Spoiler alert: I did not correctly get the bodice to match up with the waist and skirt, resulting in a waist that was a bit too tight :-/ Next time I will have to take the side seams lining up into account when I'm trying to resize something!
In case you were wondering, making everything one large size and then "taking it in" is a really bad idea if your smaller size is on the top and not the bottom. Shoulders, busts, and armholes are often completely different shapes in the different sizes, and so you can't just "trim it up" to make it smaller. It involves math somehow - don't ask me. For anyone who's bigger in the bust and smaller in the hips, it's wayyyyyy easier to make the dress to fit your top half, then take it in on the sides for the hips. Poor me is the exact opposite case, unfortunately!
Bodice
 Once I thought I had the correct sizes, I basically had to make two bodices - one in gold, one in the brocade - then sew them together right-sides-together and flip it inside out like a pillow. Voila! If it had the inclination to top-stitch, this would have come out even better.
The best part about the lined bodice is that the brocade's crazy-frayed ends didn't show. Seriously, this fabric unraveled at the drop of a hat. In hindsight, I wish I had painted all the edges with nail polish or something like that to keep it from fraying!

 |
| Thankfully the pattern hides mismatched seams pretty well |
Skirt
I actually loved this skirt! The front skirt is three panels pleated in such a way that it looks like one huge panel. The back panel somehow makes do with only two panels. The pattern ACTUALLY CALLED FOR POCKETS, but I decided to skip them because I was worried I would do it wrong and they would make the hips puff out more than they needed to. I probably shouldn't have worried about it, because the pleats puff out anyway and the pocket probably would have been nicely hidden. Oh well - hindsight!
 |
| Everything looking pretty good until I attempted the hem or the zipper |
 |
| Hemming arm of my dress form |
The hem was also a problem because of how thick the fabric was and how bad the fraying was. I think the final hem is way too thick and wide, but without a narrow hem foot I did the best I could. The brocade also responded very oddly to the iron (it changed the shape of the fabric, but did not make a crease) so I quickly abandoned that course of action. I was so worried I'd ruin the fabric! So my hem is unpressed, and hence it's a little lumpy :(
Invisible Zipper
Ah, zippers, my old arch enemy. I actually had a bit of progress on my zipper-making skills as I finally did discover a few tricks that worked. First, machine basting the zipper in made it so much more even. I pinned it down on both sides with the zipper closed, then unzipped and machine basted on the outside edges of the zipper tape. Then when I went to sew the zipper it didn't slip at all!
Second, I discovered that to make invisible zippers work you have to sew incredibly close to the teeth, but NOT ON THE TEETH. If you sew over the teeth even a little bit, you cannot zip the zipper. So... there was a lot of seam ripping on that front.
Third, my zipper foot is a piece of crap. It wobbled and didn't stay in place and so my seams would range from way too close to the teeth to not even in the same ball park. I ended up having to hold the zipper coil away from the tape by hand and inch my way down the seam slowly. The end result is an imperfect, but thankfully invisible zipper.
Unfortunately, I discovered that when I put the dress on, the zipper is crooked. I honestly have no idea how this happened, or how to fix it. Please just avert your gaze.
 |
| Inexplicably lopsided zipper |
In conclusion, I learned a lot making this dress and it only took two weekends to make. I think if I had sized it correctly to begin with, most of my problems would have been moot. The dress mercifully FIT (though was a bit tight while sitting down...) and I think it did just fine at the wedding. The best part is that since it only cost about $30 instead of $300, I don't mind if I never get to wear it again. But now I know that in a pinch, I can make a party dress!

The dress looks beautiful. Did you try the lace hem tape?
ReplyDeleteI ran out of time! So I ended up just folding it up 1/2", sewing, then folding it up another 1/2" and sewing.
Delete